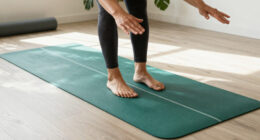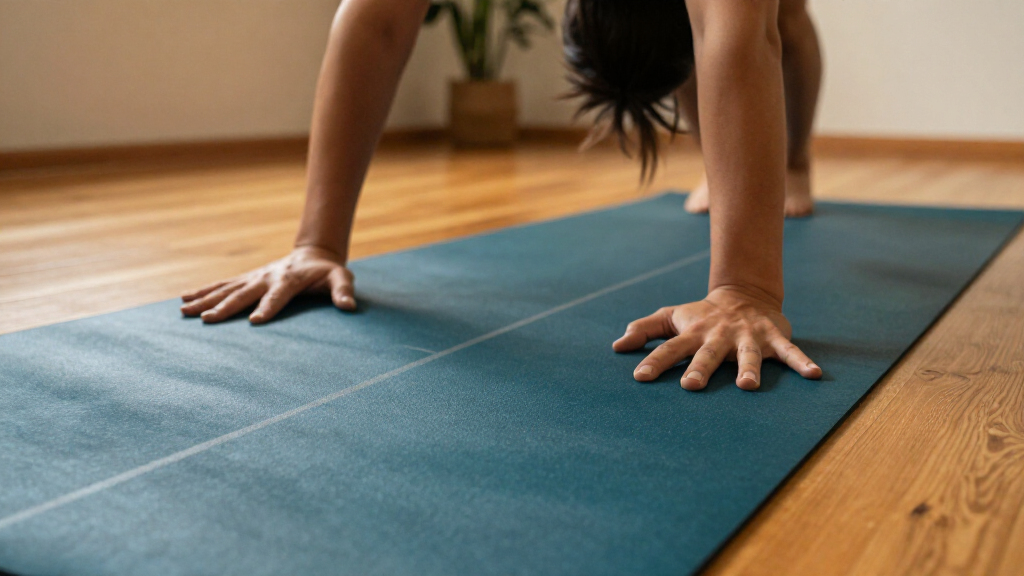

Learn how to choose a yoga mat with alignment lines, place it correctly, and use its markings as visual guides during practice. This guide is for beginners and returning students who want help checking hand, foot, and body position without treating the lines as strict rules. Allow 20–30 minutes to compare mats and set one up; using the guides takes only a few minutes during each session.

Get workout gear delivered free with Prime
- Fast, free delivery on millions of items
- Prime Video, Amazon Music and more included
- Member-only deals all year

Heathyoga Eco-Friendly TPE Yoga Mat with Body Alignment Lines and Strap
- ✔ Material: TPE; described as SGS-certified and free from latex, PVC, and heavy metals
- ✔ Dimensions: 72 × 26 inches
- ✔ Thickness: 6 mm (0.25 inch)
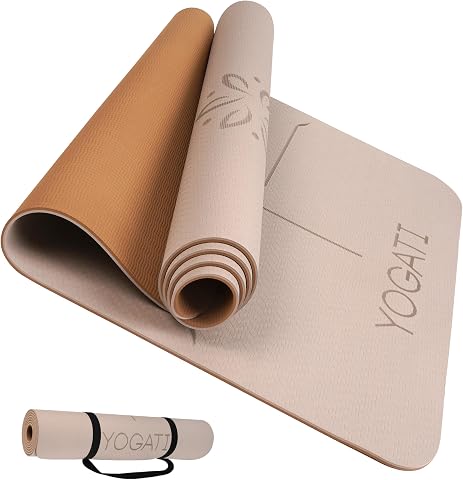
YOGATI Yoga Mat with Strap and Alignment Lines – Home Workout Mat for Women, Men, and Kids, Thick Non-Slip Yoga Mat for Pilates a…
- ✔ Material: Thermoplastic elastomers (TPE)
- ✔ Dimensions: 72 × 24 inches
- ✔ Thickness: 0.24 inch

YOGATI Yoga Mat with Strap and Alignment Lines – Thick Non-Slip Pilates & Fitness Mat (Brown, Pink, Purple)
- ✔ Material: Thermoplastic elastomers (TPE)
- ✔ Dimensions: 72 × 24 inches
- ✔ Thickness: 0.24 inch
Difficulty: Beginner | Time: 20–30 minutes to choose and set up; a few minutes each practice
What You’ll Need
Tools & Materials:
- A yoga mat with printed or embossed alignment markings
- A clear, level practice space
- A soft cloth and mild soap for cleaning, if needed
Knowledge:
- Basic awareness of your comfort and range of motion
- Ability to follow a beginner yoga class or pose instructions
Alignment markings vary by mat. Some show a center line, cross lines, or hand and foot placement guides. Check the product description or mat label to learn whether the design is intended as a visual reference and how the mat should be cleaned. Lines can help you observe position, but they do not account for every body or replace comfortable movement.
Heathyoga Eco-Friendly TPE Yoga Mat with Body Alignment Lines and Strap
Heathyoga earns the top position because its 26-inch width makes a tangible difference for people who want to use alignment lines while moving through broader stances or repositioning hands and feet. Both YOGATI mats measure 24 inches wide, so they give us less side-to-side room even though all three are listed at 72 inches long. The Heathyoga description also specifies a double-sided non-slip surface and double-layer construction, making grip and stability central parts of its case rather than relying on alignment guides alone.Its material details are the most specific in this lineup: the TPE is described as SGS-certified and free from latex, PVC, and heavy metals. That may help buyers who are comparing material exclusions. The tradeoff is straightforward: at 6 mm thick, it is still only about a quarter inch, much like the YOGATI options, and the supplied details caution that it may not cushion sensitive knees enough. It is also hand-wash only. We’d choose it for the extra width and stated traction, but skip it if compact carrying or plush joint padding matters more than space.
Pros:
- 26-inch width offers more room than either 24-inch YOGATI mat.
- Double-sided non-slip grip is specified for stability on varied floors.
- Built-in body alignment lines support posture and centering.
- SGS-certified TPE is described as free from latex, PVC, and heavy metals.
Cons:
- The 6 mm thickness may not cushion sensitive knees as much as a thicker mat.
- Hand wash only, which takes more care than machine washing.
- At 2.2 lb, it is heavier than the listed weight of either YOGATI option.
Best for: Practitioners who want alignment cues on a wider surface for centering, broad stances, and Pilates movements.
Not ideal for: People who need substantial knee cushioning, a machine-washable mat, or the narrower, lighter carry profile of the YOGATI options.
Bottom line: Choose Heathyoga if more width and specified double-sided grip make alignment easier to use in your practice.
“Choose Heathyoga if more width and specified double-sided grip make alignment easier to use in your practice.”
YOGATI Yoga Mat with Strap and Alignment Lines – Home Workout Mat for Women, Men, and Kids, Thick Non-Slip Yoga Mat for Pilates a…
For a home mat where alignment guides and joint comfort are both priorities, this YOGATI is the strongest fit in the lineup. Its description specifically calls out dense foam that cushions joints while remaining firm enough for balance poses. That balance is useful because a very soft surface can make standing work feel less steady; here, the stated aim is to soften contact without giving up a firm base. Heathyoga offers more width and double-sided grip, but its description is less specific about cushioning feel.The mat shares the other YOGATI’s 72-by-24-inch footprint, laser-etched lines, reversible two-tone design, and shoulder strap. The listed weight is 850 g, only slightly above the 0.79 kg stated for B07ML1VMPD, so neither is positioned as an ultra-light travel mat. This model’s weakness is that “thick” in its title should not be mistaken for a notably thicker option: the supplied dimension is still 0.24 inches. We’d select it for the stated foam feel and home workouts, while buyers needing extra width should look to Heathyoga.
Pros:
- Laser-etched lines guide hand and foot placement.
- Dense foam is described as cushioning joints while staying firm for balance poses.
- Textured closed-cell surface is described as providing grip during sweaty sessions.
- Reversible two-tone design and shoulder strap support everyday use and carrying.
Cons:
- At 0.24 inches thick, it may not provide enough padding for sensitive joints.
- The 850 g listed weight may feel bulky to travelers seeking an ultra-light option.
- Its 24-inch width is narrower than Heathyoga’s 26-inch surface.
Best for: Home practitioners who want laser-etched alignment cues and a mat described as cushioning joints while staying firm for balance.
Not ideal for: Travelers seeking an especially light mat, people who want more than 24 inches of width, or anyone needing clearly thicker padding.
Bottom line: Pick this YOGATI for its stated cushioning-and-firmness balance in home practice, provided 24 inches of width is enough.
“Pick this YOGATI for its stated cushioning-and-firmness balance in home practice, provided 24 inches of width is enough.”
YOGATI Yoga Mat with Strap and Alignment Lines – Thick Non-Slip Pilates & Fitness Mat (Brown, Pink, Purple)
This YOGATI is the portability-minded pick: its listed 0.79 kg weight is a little lower than the 850 g listed for the other YOGATI, and it also rolls up with a shoulder strap. Both products have the same stated 72-by-24-inch dimensions and 0.24-inch thickness, so buyers should not expect a different alignment setup or more cushioning from choosing between them. Compared with Heathyoga, this mat is narrower but offers a lighter listed carry weight.Its laser-etched alignment lines, textured closed-cell surface, and reversible design make for a practical set of features for yoga and general fitness. The description says the surface stays put during sweaty sessions, but the supplied information does not provide a direct, comparable grip measurement against Heathyoga’s double-sided surface. We therefore see the two as different fits: Heathyoga emphasizes grip on both sides and more width, while this YOGATI gives carrying a slight edge. Its limitations are the shared thin profile, hand-wash-only care, and limited color selection. It makes sense for regular trips to class, but not for people who prioritize extra room or knee padding.
Pros:
- Listed at 0.79 kg, slightly lighter than the other YOGATI model’s 850 g.
- Laser-etched lines guide hand and foot placement.
- Textured closed-cell surface is described as staying put during sweaty sessions.
- Reversible two-tone design includes a shoulder strap for carrying.
Cons:
- The 0.24-inch profile may not cushion high-impact exercise or sensitive knees sufficiently.
- Hand wash only.
- Color choices are limited to Brown, Pink, and Purple.
Best for: Yoga students who carry their mat to class and want alignment markings, a shoulder strap, and a slightly lower listed weight than the other YOGATI.
Not ideal for: People who need a wider mat, substantial cushioning, machine-wash convenience, or a clearly distinct alternative to the other YOGATI’s dimensions and line features.
Bottom line: Choose this YOGATI if carrying convenience edges out extra width and cushioning in your decision.
“Choose this YOGATI if carrying convenience edges out extra width and cushioning in your decision.”
As an Amazon Associate we earn from qualifying purchases.
Before You Start
Choose a space where the mat lies flat and you can extend your arms and legs without hitting furniture. If you have an injury, balance concern, or pose-related pain, follow advice from a qualified health professional or yoga teacher. Stop a movement that causes sharp pain, numbness, or dizziness. Do not force your hands or feet onto a line just to make your pose look symmetrical.
Step-by-Step Instructions
Step 1: Choose a mat that fits your practice
Compare the mat’s length, width, thickness, surface grip, and alignment design. Pick a length that lets you lie down with your head and feet supported, and a width that gives you room to move your arms. Consider where you practice: a heavier mat may suit a fixed home space, while a lighter one is easier to carry. Look at the product’s care instructions and check whether the markings remain visible against the mat color.
Tip:Do not choose by line design alone. A mat that slips on your floor or feels uncomfortable under your knees can distract you from practice.
Check: You can lie on the mat comfortably, move through a wide stance, and see the markings clearly in the room where you plan to practice.
Step 2: Prepare the practice area
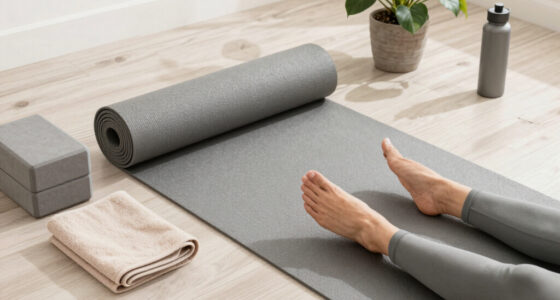
Clear furniture and small objects away from the mat. Place it on a clean, level floor, unroll it fully, and smooth any curled edges. Turn the mat so its center line runs from the end near your head to the end near your feet. If the mat has a logo or a specific top end, follow the orientation described by its maker.
Tip:Check the mat’s grip with bare hands and feet before starting. A dusty floor or damp surface can make a mat slide.
Check: The mat stays flat when you step onto it, and the lengthwise center marking runs straight along your practice space.
Step 3: Learn what each marking indicates
Stand beside the mat and identify its main center line, cross lines, and any hand or foot guides. Match each marking to a simple reference: use the center line to notice whether your body is drifting sideways, and use cross lines to compare the position of your hands or feet. Read any printed guide supplied with the mat before using less familiar symbols.
Tip:Use lines as visual cues, not measurements you must obey. Stance width and hand position can differ with body proportions, mobility, and the pose being practiced.
Check: You can point out the main markings and describe how you plan to use them as references during a pose.
Step 4: Set a comfortable standing position
Step onto the mat and stand near its center. Place your feet in a comfortable, balanced position, then use the center line to check whether your weight or stance has shifted to one side. Keep your knees relaxed and let your arms rest naturally. Adjust your feet for comfort rather than forcing them to match a particular cross line.
Tip:If you feel pressure on one foot or find yourself leaning, make a small adjustment and check your balance again.
Check: You can stand without slipping and feel reasonably balanced through both feet, with the line helping you observe your position.
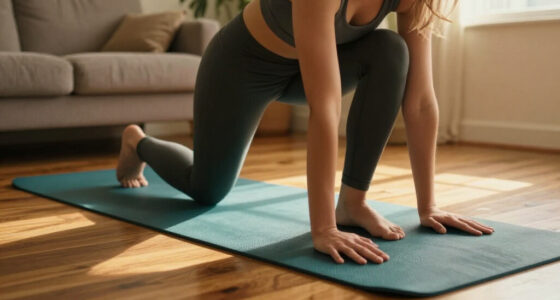
Step 5: Use the guides in a hands-and-knees pose
Lower yourself onto your hands and knees. Place your hands where they feel stable, then use the cross lines to compare their spacing and the center line to check whether your chest and hips are drifting to one side. Keep your shoulders comfortable and position your knees where they support you. Make small changes one hand or knee at a time.
Tip:Hand markings are starting references, not fixed targets. Widen your hands or add padding if that feels more comfortable.
Check: Your hands and knees feel supported, your weight is not sharply pressing into one side, and you can breathe normally.
Step 6: Check your stance in a standing pose
Move into a familiar standing pose, such as Warrior II, following instructions from your class or teacher. Set your feet according to the pose, then glance at the mat’s cross lines to compare their distance and direction. Use the center line to check whether your torso is leaning or turning more than intended. Adjust only as much as you need to feel stable and comfortable.
Tip:Different bodies need different stance lengths and angles. Do not twist a knee or force a foot to line up if it creates discomfort.
Check: You can hold the pose steadily, breathe, and make a small adjustment without pain or loss of balance.
Step 7: Recheck position without staring at the mat
After using a line to make an adjustment, lift your gaze and notice how the pose feels. Check whether your weight is steady, your joints feel comfortable, and your breath remains easy. Use the markings again only when you want a quick reference. Practice moving on and off the lines so you can build awareness beyond the printed pattern.
Tip:Repeatedly looking down can affect balance in standing poses. Check your position before holding the pose, then focus on a stable gaze.
Check: You can use a marking for a brief check, then maintain a comfortable pose without continually watching your feet or hands.
Step 8: Clean and store the mat
Follow the care instructions supplied by the mat’s maker after practice. If permitted, wipe the surface with a soft cloth and a mild cleaning solution, then let it dry fully before rolling. Roll the mat without folding it across raised or printed markings, and store it away from direct heat or sunlight when the care label recommends this.
Tip:Aggressive cleaners or soaking can damage some surfaces or fade markings. Check the label before using disinfectants or oils.
Check: The mat is dry, free of visible residue, and stored without a sharp crease or damage to its markings.
Common Mistakes to Avoid
- Forcing hands or feet onto the printed marks even when the position feels strained. — Treat each mark as a reference. Adjust your stance for comfort, stability, and the pose instructions.
- Assuming alignment lines guarantee correct form. — Use the markings to notice position, then consider comfort, balance, breathing, and qualified instruction.
- Starting practice before checking whether the mat slips. — Test the mat on the actual floor with dry hands and feet, and clean dust from the floor if needed.
- Cleaning with a product that damages the mat surface. — Read the manufacturer’s care directions and test an approved cleaner on a small area if directed.
Troubleshooting
Problem: The mat shifts during standing poses.
Solution: Pause and step off safely. Check for dust or moisture under the mat, clean and dry the area, and test grip again. If it still slides, use it on a more suitable surface or choose a mat designed for better traction.
Problem: The lines seem to make your stance feel awkward.
Solution: Move your feet to a comfortable position and use the markings only to observe relative placement. If a pose remains uncomfortable, choose a gentler variation or ask a qualified teacher to check your setup.
Problem: You cannot see the markings clearly.
Solution: Improve the room lighting and check whether the mat is oriented with its top side facing up. If the marks remain hard to see, use the mat’s center or edge as a simpler reference.
Problem: Your hands or knees feel sore on the mat.
Solution: Stop and adjust your position. Try a folded towel or approved knee pad, reduce pressure, or choose a thicker surface if appropriate. Get professional advice if pain persists or worsens.
What Success Looks Like
You have a mat that fits your body and practice space, lies flat, and provides markings you can identify. During a few familiar poses, you can use the lines to notice hand, foot, or body position while keeping a stable base, breathing comfortably, and avoiding forced joint positions. The practice area is clear, the mat does not slide, and the surface is cleaned and stored according to its care directions.
Next Steps
Use the mat for a short familiar sequence and note which markings help you most. Recheck grip and mat condition regularly, especially if you practice on a different floor or clean the surface. As your body awareness improves, rely on the markings when they are useful and follow pose instructions or teacher feedback when they differ from the printed guides.
Frequently Asked Questions
Are yoga mat alignment lines suitable for beginners?
Yes. They can offer a simple visual reference for hand, foot, or body placement. Start with familiar poses, make comfortable adjustments, and follow clear instruction rather than trying to match every line.
Do I need to put my feet directly on the lines?
No. The markings show reference points, not required positions. Stance width and foot angle vary by pose and person. Choose a position that feels stable and does not strain your joints.
Can alignment lines correct my yoga form?
They can help you notice where you are positioned, but they cannot assess every detail of a pose or how it feels in your body. For technique questions, ask a qualified yoga teacher.
How do I clean a yoga mat with printed lines?
Follow the mat maker’s care directions. Use only approved cleaning products, and let the mat dry fully before rolling it so moisture and residue do not remain on the surface.
What should I do if a line conflicts with my teacher’s instructions?
Follow the teacher’s pose-specific guidance and prioritize a comfortable, stable position. Mat markings are general visual cues and may not match every variation or body.