
TL;DR

Get workout gear delivered free with Prime
- Fast, free delivery on millions of items
- Prime Video, Amazon Music and more included
- Member-only deals all year
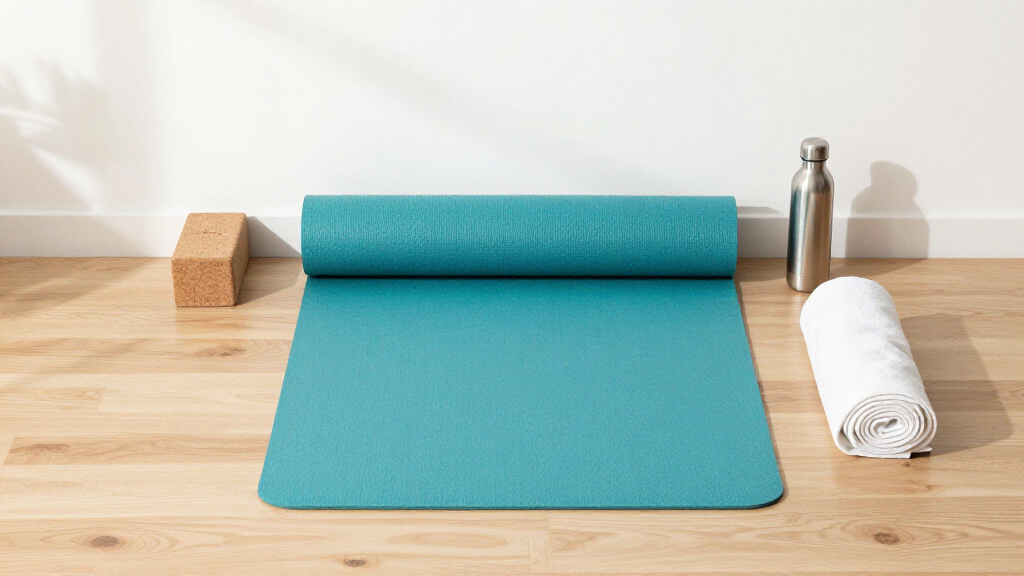
For home practice, a 5–6mm mat with good grip suits most people: thick enough for knees on hard floors, thin enough for balance poses. Material matters more than price — natural rubber offers the best grip, PVC the best durability, TPE the best budget-to-comfort ratio. Replace your mat when it starts slipping, peeling, or losing its shape.
Your knees know the difference between a $15 mat and a $70 mat about four seconds into a low lunge on a hardwood floor. That’s usually when most people realize the thin, slippery mat they bought on impulse isn’t going to survive a real home practice.
The good news: you don’t need the most expensive mat on the shelf. You need one that matches your floor, your style, and your hands. A person doing gentle stretching on carpet has completely different needs from someone sweating through vinyasa flows on tile.
In this guide, you’ll learn exactly how thickness, material, and grip affect your practice — with real numbers, real comparisons, and a simple process for picking the right mat the first time.
5–6mm thickness is the sweet spot for home practice on hard floors; go 4–5mm on carpet.
Material determines grip more than price: natural rubber grips best wet or dry, while basic PVC becomes slippery with any sweat.
Roll your mat with the practice surface facing out and store it away from sunlight to double its lifespan.
Clean with water and a drop of dish soap — bleach and alcohol wipes dry out the material.
Replace your mat when it slips when clean, sheds material, or won’t lie flat: roughly every 1–2 years for PVC/TPE, 3–5 for rubber.
Why Mat Thickness Matters More at Home Than in a Studio
For home practice, 5–6mm is the sweet spot for thickness — thick enough to cushion knees and wrists on hard floors, thin enough to keep you stable in standing poses. The reason this range matters more at home is simple physics meeting simple economics: studios install sprung wood floors specifically to absorb impact, so a thin mat works fine there. Your living room floor was built for furniture, not chaturangas, so the mat has to do all the shock absorption itself.
Here’s the part most guides skip: a mat’s listed thickness isn’t what you actually get under pressure. A standard 6mm PVC mat compresses to roughly 3–4mm under a kneeling load. This matters because the cushioning you feel standing on the mat in the store is not the cushioning your kneecap experiences when your full body weight concentrates on a point the size of a coin. Density, not just thickness, determines real-world comfort — which is why two 6mm mats can feel completely different under the same knee.
The implication: if you practice on hardwood or tile and go thinner than 5mm, you’re not choosing slight discomfort — you’re choosing cumulative joint stress. Sore kneecaps within a week is the typical outcome, because the bone is pressing against a surface that offers almost no give at body weight.
But thicker isn’t automatically better, and this is the tradeoff most buyers get wrong. Anything above 8mm feels like practicing on a mattress — your ankles wobble in Warrior III and your hands sink in during plank. The reason is proprioception: your balance system relies on subtle pressure feedback from a stable surface. A squishy mat blurs that feedback, so your ankles make constant micro-corrections you can’t control. For balance poses, a firmer surface is literally safer, not just more comfortable.
Scenario: my neighbor bought a cushy 15mm mat for her back, then couldn’t hold Tree Pose without tipping over. She switched to 6mm with a folded blanket under her knees for floor work. The lesson: solve cushioning problems selectively (blankets for knees) rather than globally (a thicker mat), because a thick mat compromises every standing pose to fix a problem that only affects a few floor poses. Problem solved for about $40 total.
Products Worth Considering

Blueair Blue Pure 211i Max Air Purifier for Large Rooms

LEVOIT Vital Pet Smart Air Purifier

Therabody ThermBack LED 4-in-1 Heated Lower Back Relief Wrap
As an affiliate, we earn on qualifying purchases.
Mat Materials Compared: Which One Actually Keeps You From Sliding
Natural rubber offers the best grip of any common mat material, followed by PU-coated rubber, then TPE, with basic PVC at the bottom — especially when wet. Why does this ranking matter so much? Because grip is a safety feature, not a comfort feature. When your hands slide in Downward Dog, your body instinctively compensates by gripping with the fingers and shrugging the shoulders — the exact habits yoga is supposed to undo. Over months, practicing on a slippery mat can reinforce wrist strain and poor shoulder alignment without you noticing.
The underlying mechanism: grip comes from how the material interacts with moisture. PVC is a closed-cell plastic that repels water, so sweat sits on the surface as a lubricating film — the reason a cheap PVC mat feels fine dry and turns into an ice rink the moment your palms dampen. Rubber and PU are slightly tacky and either absorb or channel moisture, which is why they grip better as your hands get wet. Cork works the same way, thanks to its naturally waxy, antimicrobial surface.
| Material | Grip (dry/wet) | Typical Price | Lifespan | Best For |
|---|---|---|---|---|
| PVC | Good / Poor | $15–35 | 1–2 years | |
| TPE | Good / Fair | $30–60 | 1–2 years | Light use, easy on knees |
| Natural rubber | Excellent / Excellent | $60–100 | 3–5 years | Sweaty hands, daily practice |
| PU-coated rubber | Excellent / Excellent | $90–140 | 2–4 years | Hot yoga at home |
| Cork + rubber | Good / Better when wet | $50–90 | 3–4 years | Sweaty practice, eco preference |
The tradeoffs behind these numbers: PVC is the most durable per dollar and easiest to clean, but its wet-grip failure makes it a false economy for anyone who sweats. TPE is lighter and more cushioned but degrades faster — the foam compresses permanently at pressure points, which is why TPE mats develop smooth, thin spots where your hands go. PU-coated rubber grips superbly but the coating absorbs oils and stains over time; it’s the premium choice that ages fastest cosmetically. Natural rubber is the best all-rounder, with the one-two caveat below.
Natural rubber smells faintly like tires for the first week or two — the material off-gasses volatile compounds after manufacture. Air it out near a window before rolling it into a small room. And if you have a latex sensitivity, check with your doctor before choosing rubber and consider cork or TPE instead, since natural rubber and latex proteins can cross-react.
How to Pick Your Mat in 4 Steps (Without Overthinking It)
Choose your mat by answering four questions in order: what floor is under you, what style do you practice, how much do you sweat, and what’s your budget. The order matters — each answer filters the next question’s options. Starting with budget (as most people do) forces compromises on the factors that actually affect your practice, while starting with your floor eliminates entire categories before price even enters the picture. This sequence eliminates 90% of the options and gets you to a shortlist fast.
- Check your floor. Carpet? Go 4–5mm — the carpet adds cushion, and stacking a thick mat on carpet creates the same wobble problem as an over-thick mat on hardwood. Hardwood or tile? Stay at 5–6mm minimum, because the mat is your only shock absorber.
- Match your style. Restorative or yin: prioritize cushion (6mm+) — you’re holding floor poses for minutes at a time, so sustained knee and hip pressure is the main comfort variable. Vinyasa or ashtanga: prioritize grip and stability (4–5mm) — you’re loading the mat dynamically with sweaty hands and balancing on one leg, so surface feedback and traction outweigh cushioning.
- Be honest about sweat. Damp palms mean rubber, PU, or cork. Skip basic PVC entirely — not because it’s a bad material, but because its moisture behavior works directly against your practice. This is the step people rationalize their way out of, and it’s the one that most determines whether you’ll be frustrated in month three.
- Set a real budget. A solid mat costs $50–80 and lasts 2–4 years with weekly use — under $1 per practice. Reframe cost as cost-per-session: a $25 mat replaced every year costs the same over four years as an $80 rubber mat, but with worse grip the whole time. The budget tier isn’t always the cheap one.
Concrete example: a friend practicing yin yoga on carpet bought a 4mm cork mat for $55 and loves it — thin works for her because the carpet cushions and yin never loads the mat dynamically. I sweat through vinyasa on hardwood, so I paid $85 for a 5mm natural rubber mat. Different answers, same logic.
3 Home Setups That Ruin a Good Mat (and Easy Fixes)
The three most common mat-killers at home are sunlight, improper storage, and cleaning with harsh chemicals — all fixable in under a minute each. According to mat manufacturers like Manduka and Liformi, UV exposure breaks down both PVC and natural rubber faster than daily use does. The reason: UV radiation severs the polymer chains in these materials, so the surface that used to be tacky and elastic becomes brittle and powdery. You can’t reverse it — a sun-damaged mat is permanently degraded, which is why prevention is the only strategy.
- Sunlight through a window: don’t store your mat in that sunny corner. UV makes rubber crumble and PVC crack, and it happens even through glass, which blocks some UVB but lets UVA through freely. Roll it into a closet or under the bed.
- Rolling it wrong: roll with the practice surface facing out. This isn’t superstition — rolling inwards compresses the grip texture against itself for weeks at a time, and foam materials take a permanent set under sustained compression. That’s where flat spots and dead-grip patches come from.
- Wiping with bleach or alcohol wipes: these dissolve the plasticizers that keep the material supple, so the mat dries out, stiffens, and micro-cracks. Use a spray of water with a drop of gentle dish soap, wipe with a soft cloth, and air-dry flat. The tradeoff of gentle cleaning is that it takes a minute longer — but harsh cleaning saves thirty seconds now and costs you a season of grip later.
Quick scenario: one reader’s mat went from grippy to slippery in four months because she stored it on a sunny windowsill. Same model mats typically last three years. That’s roughly seven times the lifespan difference from one storage decision — which is why this section exists. The cheapest way to upgrade your mat is to stop destroying the one you have.
The fastest way to ruin a $90 mat isn’t use — it’s storing it next to a sunny window.
When to Replace Your Mat (3 Clear Signs)
Replace your yoga mat when it loses grip, sheds material, or stops lying flat — typically every 1–2 years for PVC or TPE and every 3–5 years for quality rubber. Why treat these as replacement triggers rather than annoyances to work around? Because a worn mat doesn’t just feel worse; it changes how you practice. When the surface stops gripping, your hands start doing the gripping — you clench your fingers, shift weight away from the pose, and subtly avoid loading the wrists. Over weeks, that compensation becomes habit, and the habit follows you onto any mat.
Sign one: your hands slide in Downward Dog even when the mat is clean and dry. That means the surface texture is worn smooth. Grip depends on microscopic texture — millions of tiny peaks that interlock with your skin. Once those peaks are polished flat by hundreds of practices, no amount of cleaning brings them back, because the material itself is gone.
Sign two: peeling or flaking. If you see little bits of mat on your pants after practice, the material is breaking down — and there’s an implication most people miss: in floor poses, your face is centimeters from the mat, breathing whatever’s shedding off it. You’re inhaling those particles with every breath during Savasana. A flaking mat is a replacement decision, not a cleaning decision.
Sign three: the ends curl up and won’t lie flat. Your mat has a material memory, and once that memory is warped — usually from heat, sun, or being stored rolled tightly for months — every pose feels uneven because you’re balancing on a subtle bump or slope. This one is a stability issue, not just an aesthetic one: a curled edge under your foot in a standing pose behaves like a wobble board you didn’t ask for.
Don’t toss the old one, though. Retired mats make excellent knee padding for gardening, cushioning under furniture movers, or padding in the trunk of your car. Degraded grip is useless for yoga but perfectly fine for jobs where all you need is foam.
Frequently Asked Questions
How thick should a yoga mat be for home use?
For home use on hardwood or tile floors, choose a 5–6mm mat — it cushions knees without destabilizing balance poses. On carpet, 4–5mm is enough because the carpet adds cushioning. Avoid mats above 8mm for active styles, as they make standing poses wobbly.
Why does my yoga mat slip on the floor at home?
Most slipping comes from a dusty floor or a new mat’s factory coating. Wipe your floor with a damp cloth, and break in new mats by spraying lightly with water and doing a few sessions — grip improves after the surface texture roughs up slightly. If the mat itself slides on smooth floors, place a thin towel underneath.
Are expensive yoga mats worth it for beginners?
Not necessarily. A beginner practicing a few times a week does fine with a $40–60 TPE or cork mat. Spend more ($70–100) only if you sweat heavily or practice daily, since premium natural rubber mats grip better and last 3–5 years versus 1–2 for budget mats.
How do I clean a yoga mat at home?
Mix water with a drop of gentle dish soap in a spray bottle, lightly mist the mat, wipe with a soft cloth, and let it air-dry flat. Do this every 1–2 weeks. Avoid bleach, alcohol wipes, and machine washing — all three break down the mat’s material and grip.
Can I use a towel instead of a yoga mat at home?
A towel works occasionally for gentle stretching, but it bunches, slides, and gives no cushioning for knees and wrists. If you practice more than once a week, even a basic $25 mat is a worthwhile upgrade for stability and joint comfort.
Conclusion
Match the mat to your floor, your sweat, and your style — in that order — and you’ll land on the right one without overspending. A $60–80 natural rubber or cork mat handles almost every home situation well.
Your mat is the one piece of equipment you touch for the entire practice. Buy the one your knees will thank you for at 6 a.m. tomorrow.